
Attaching the Pupular Harness Band: A Quick Setup Guide
Share
We designed the Harness Band to be as easy to use as it is impactful. Whether you're using it to share your pet's personality or communicate important needs like “Reactive” or “Friendly,” setup takes less time than clipping on a leash.
In this quick guide, we’ll show you how to attach your Harness Band in under two minutes — no tools, no stress.
🐾 What You’ll Need:
-
Your Harness Band
-
Your pet’s existing harness, leash, or collar
-
A patch of your choice (optional, but recommended!)
⏱ Step-by-Step Setup (Takes Under 2 Minutes!)
1. Choose a Spot
The Harness Band can be attached to:
-
Harness straps (front, chest, or side)
-
Leash handle or midline
-
Standard flat collar
Pick a spot that’s visible and won’t interfere with your pet’s movement.
💡 Tip: For reactive or working dogs, the side strap of a harness is a great place for clear visibility.
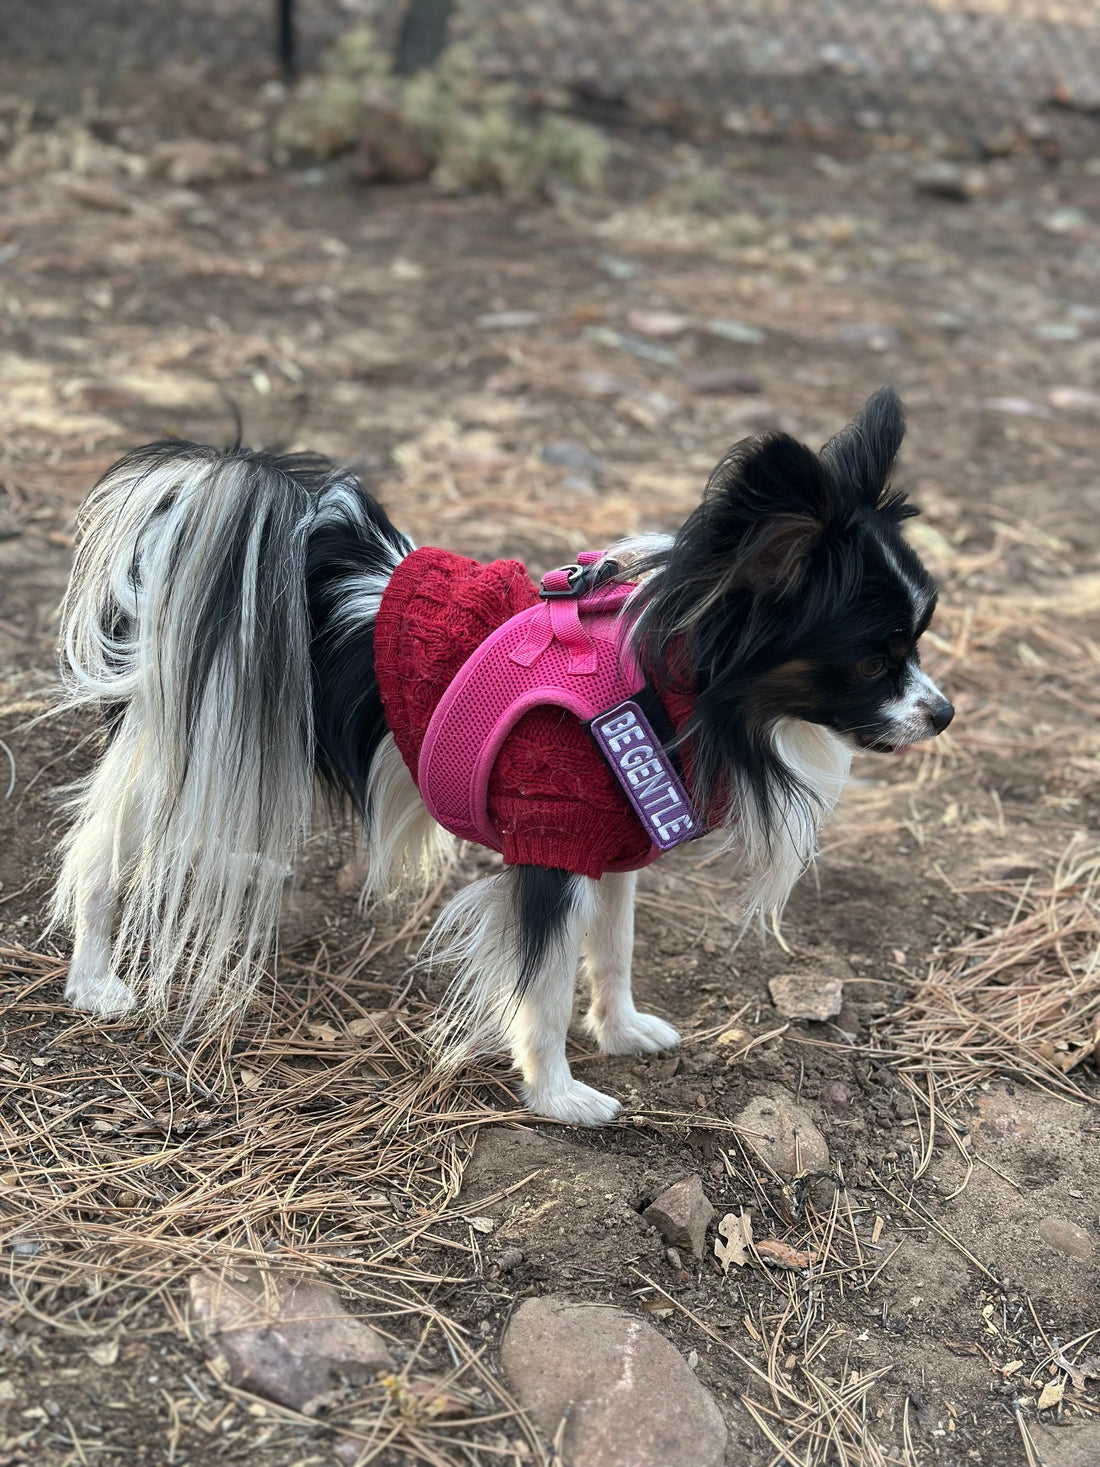
2. Wrap the Harness Band Around the Harness Strap
Open the Harness Band and wrap it around your chosen location. It should lie flat and hug the strap snugly.
3. Secure the Harness Band with the Velcro Closure
The built-in Velcro fastener will hold tight once wrapped. Make sure it's centered and flush — not twisted or bunched up.
4. Attach Your Patch
If you’re using a patch (a Pupular patch or one of your own), press it onto the Velcro face of the band. That’s it!
✅ Good to go. The patch can be removed or swapped out whenever you need — no need to unclip the band itself.
👀 Want to Switch It Up?
You can:
-
Move the band between different gear
-
Use multiple bands for more visibility
-
Switch out patches depending on your pet’s mood, environment, or needs
🧼 Care Tips:
-
Spot clean with a damp cloth
-
Remove from gear before washing
-
Store flat to maintain shape
You're Ready!
In under two minutes, you’ve just upgraded your pet’s walk — and how the world understands them.
Clear, calm communication starts here.

